
I’ve recently moved house and have a bit less space for my work / play desk (a huge, deep table-top). Additionally, I’ve been doing a lot more typing on it (loads of PowerShell in my current job!) and I’ve been finding it more uncomfortable sitting at it typing for long periods.
Last, I’ve recently gotten a large, wide-screen monitor and it’s footprint was eating up a large amount of the desk-space I had.
So, after a bit of reading and hunting around, I got myself an Obutto Revolution.
It’s an interesting design and it revolves around the idea that most people don’t need a large, flat desk any more. Mostly we don’t draw or write by hand; almost all of our work is done with a keyboard and mouse.
So, the “desk” is gone.
The monitor and chair are supported as part of a large metal frame with various points for bolting on additional, optional parts you can either buy, make or cannibalise from other bits of kit.
The parts arrived after a few days and the boxes looked in a sorry state; 2 enormous boxes and 3 large ones arrived and they’d been seriously knocked about. Luckily, all the parts inside were really well packed and so nothing was damaged. Not sure what else they could have done either; one of the boxed contained 50KG of metal parts so as the boxes were moved, they shifted inside and damaged the box.
The parts themselves were packaged in numbered boxes that made setting up a lot easier but don’t try and use the written instructions; there are some great instructional videos here. It does take a while and I made liberal use of the rewind and pause buttons to see exactly what I needed to d but the instructions were nice and clear.
The way the system was constructed was clever; the various parts attach together using similar (or the same) systems so there’s not a plethora of different screws and connectors to keep track of. Most of the time there’s plenty of clearance to connect the parts with the bolts and there’s normally only one way you can attach things (if you use the video; the written instructions are a bit more unclear so I only used them for reference).
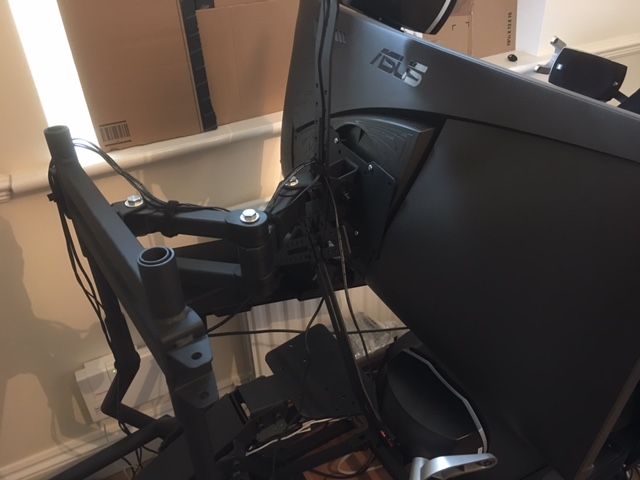
I had a couple of stumbling blocks however; one of the rails on my seat was mis-aligned compared to the other and the monitor mount was a tough fit on the back of my curved monitor. Obutto support was really good, emailing me back over the weekend to suggest what I could do and both problems were resolved quickly. (The sales person I talked to initially was also really good; she answered lots of questions and made sure one of the boxes (which was delivered apart from the others) was on the way when I checked.)
The Revolution is very much a framework for what you want to do with it; it builds fine “out of the box” but there’s loads of scope for customising it for what you want to do. For example, the optional speaker kit you get mounts the front speakers on a inverted “T” shape behind the monitor; with the centre over the monitor and the two other speakers out to each side.
However, my ultra-wide format monitor is too wide for the two side struts to protrude so what I did instead was arrange the shape of the support struts in an inverted “Y” shape instead so the two sides are held underneath my monitor. It works well, and the way the mount (and the Revolution as a whole) comes with loads of extra holes to allow you to construct it how you like.
It’s very adjustable; the seat moves forwards, backwards and reclines, the monitor is on an adjustable arm and the keyboard tray is fully articulated. Optionally you can get an additional couple of arms for another monitor / desk surface.
Having now got it (mostly) finished I’ve been using it for the better part of a week. It’s great; I can get into the seat, pull my keyboard and second monitor around me and have everything I need to hand. I have a couple of extra surfaces on arms as well but so far I’ve only needed them to hold snacks (there’s a cup-holder built in already!) Everything is very solid and steady and for both work and gaming it’s been fantastic.
It’s advertised as a desk-replacement / cockpit and the next thing on the agenda is to mount my HOTAS on it and give Elite Dangerous a go. I want to save that for last though as I think that’s going to be awesome 😀
Tips for Construction
Have a plan!
It’s quite heavy and once it’s set up you don’t want to move it too much (it’s possible, just difficult). Have a good think where you want it to go, where you want the articulated arms to go etc.
Read ALL of the instructions before you start
If you’ve got a couple of the optional packs, read / watch ALL the instructions before you start. On the main frame video there’s a helpful tip at the start where it points out you should install one of the parts from one of the optional sets if you have it. I discovered that the speaker mounts should ideally have been put on when I was first installing the monitor; if I’d read those instructions ahead of time I’d have saved myself some time!
Leave plenty of time
It’s not massively difficult to build but it is time-consuming so make sure you’ve got enough time.
Get a lot of space to build it
The frame itself is big enough but you need some space to construct each stage as you go. Some of these are very big too. I built the various bits on dog-towels too to spare the floor 😀
Get a Ratchet Screwdriver with Multiple Heads
The kit comes with the correct sized spanner and Allen keys but having a ratcheting screwdriver with the correct heads makes life a lot easier.
Daughter to Assist With Fiddly Bits
While I could reach everything to tighten the bolts, having someone to help with smaller fingers can be a godsend. Warning; having children to help with the construction increases the overall cost tremendously 😀
